1.1: Part 1 - Making Phone Calls
Contents:
- What you should already KNOW
- What you will LEARN
- What you will DO
- App overview
- Task 1: Send an intent with the phone number to dial
- Task 2: Make a phone call from within an app
Android mobile devices with telephone/cellular service are pre-installed with a Phone app for making calls, which includes a dialer for dialing any phone number. You use an implicit Intent to launch the Phone app from your app. You have two choices:
- Use
ACTION_DIALto launch the Phone app independently from your app with the phone number displayed in the dialer. The user then makes the call in the Phone app. This is the preferred action for apps that don't have to monitor the phone's state. - Use
ACTION_CALLto launch the Phone app in the context of your app, making the call directly from your app, and monitoring the phone state. This action keeps the user within your app, without having to navigate back to the app. Your app must request permission from the user before making the call if the user hasn't already granted permission.
What you should already KNOW
From the previous chapters, you should be able to:
- Create and run interactive apps in Android Studio.
- Work with XML layouts.
- Create an implicit intent to perform an action using another app.
What you will LEARN
In this practical, you will learn to:
- Pass a phone number to the Phone app's dialer.
- Perform a phone call within your app.
- Test to see if telephony services are enabled.
- Check for calling permission, and request permission if required.
What you will DO
In this practical, you will:
- Create an app that uses an implicit intent to launch the Phone app.
- Create another app that makes phone calls from within the app.
- Test to see if telephony services are enabled before enabling the app.
- Check for calling permission, which can change at any time.
- Request permission from the user, if necessary, to make the call.
App overview
You will create two apps:
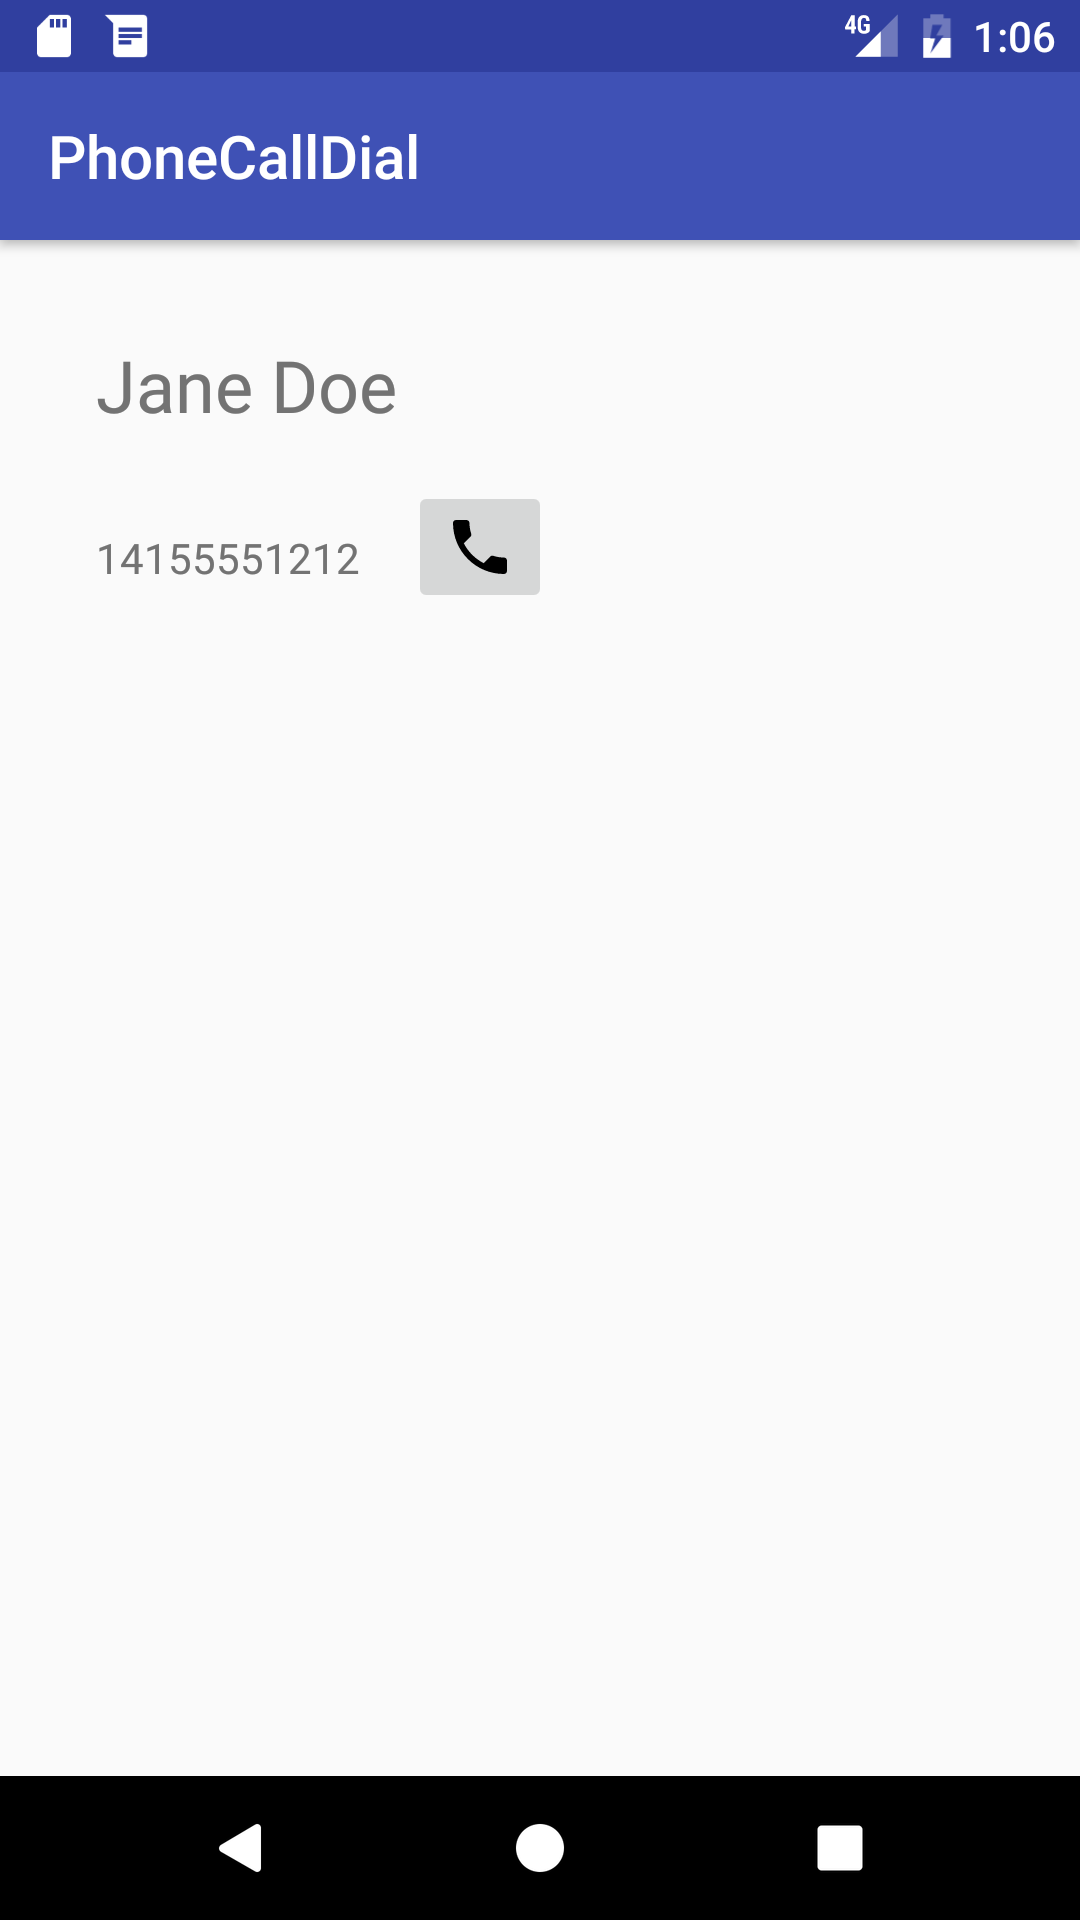
PhoneCallDial: A basic app that uses an implicit intent to launch the Phone app with a hard-coded phone number for dialing. The Phone app makes the call. You could use this technique to provide a one-button dialer to custom support. In this lesson you will build a layout, shown in the figure below. It includes a TextView with a hard-coded phone number, and an ImageButton with an icon to launch the Phone app with that phone number in its dialer.
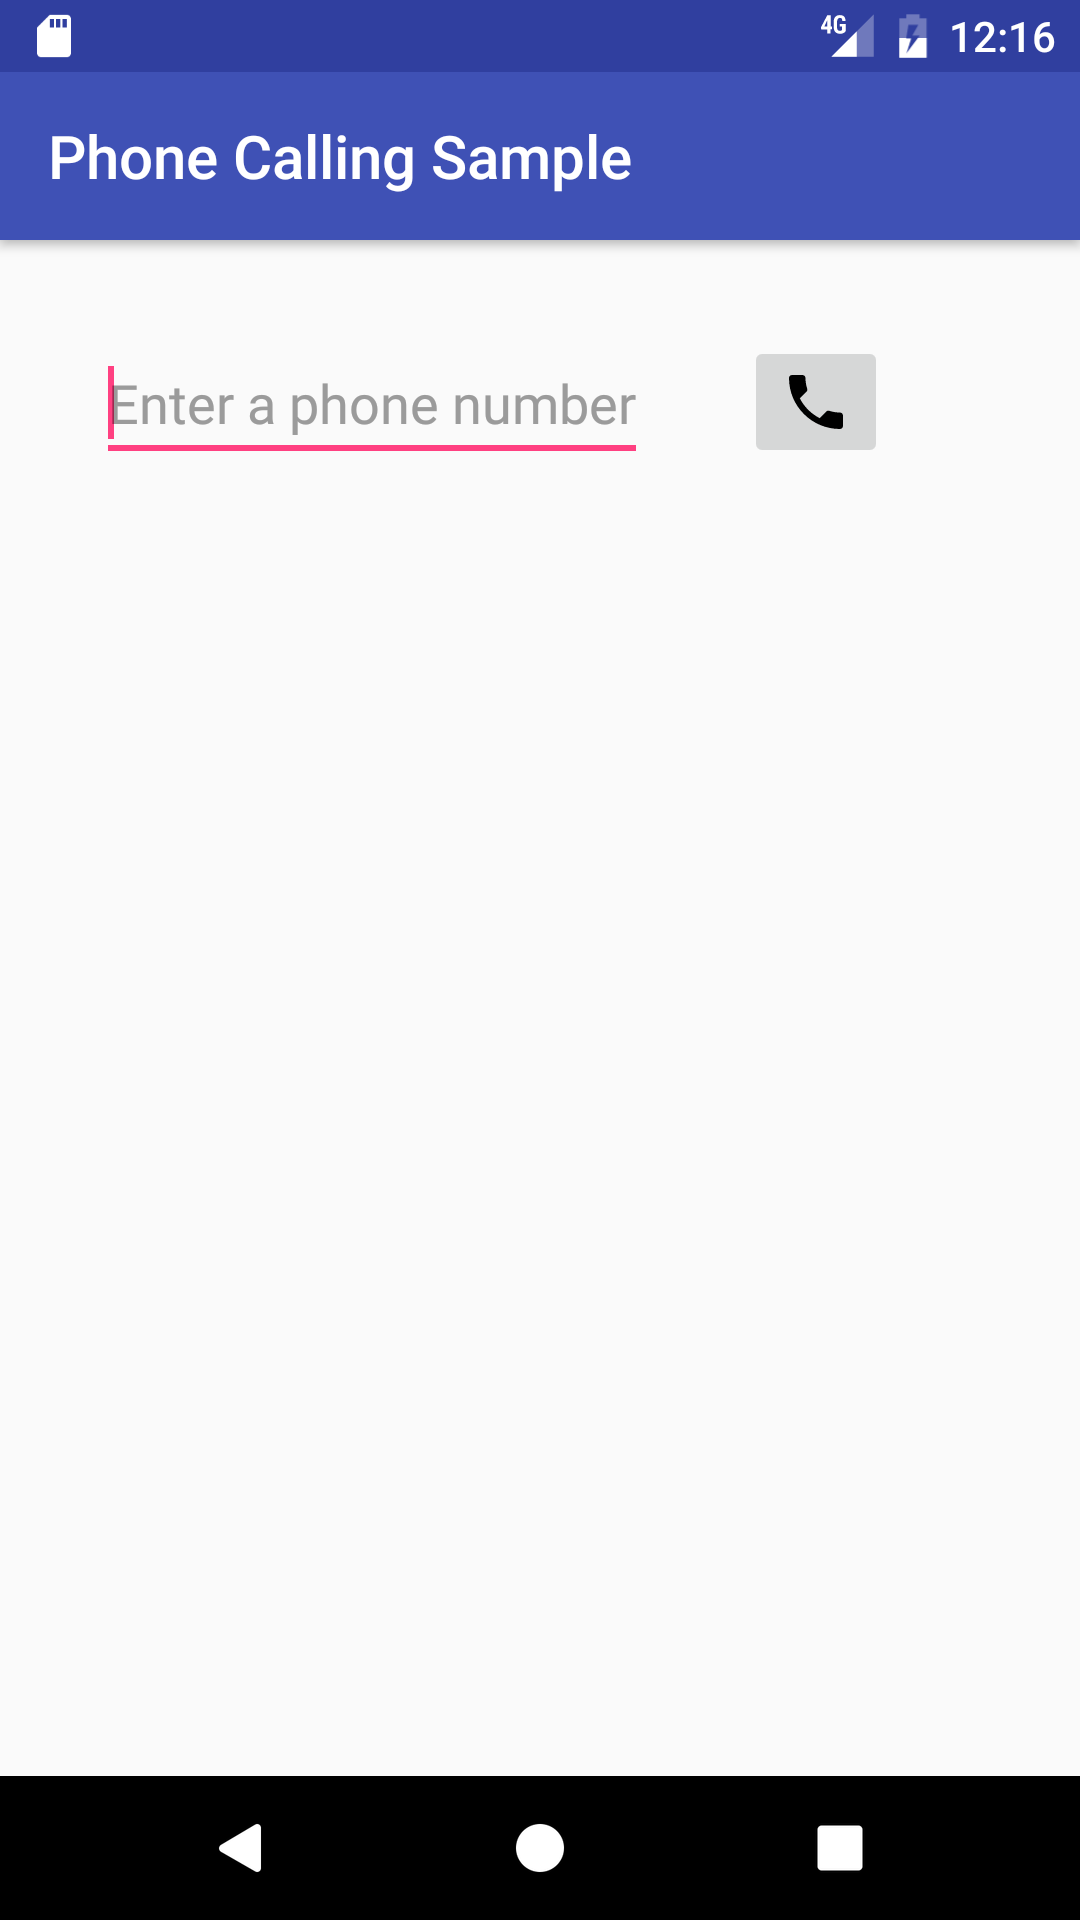
Phone Calling Sample: An app that secures permission, uses an implicit intent to make a phone call from the app, and uses the TelephonyManager class to monitor the phone's state. You would use this technique if you want to keep the user within your app, without having to navigate back to the app. In this lesson, you modify the above layout to use an EditText so that users can enter the phone number. The layout looks like the figure below:
Task 1. Send an intent with the phone number to dial
In this task you will create an app that uses an implicit intent to launch the Phone app to dial a given phone number. To send that intent, your app needs to prepare a Uniform Resource Identifier (URI) that is prefixed by "tel:" (for example tel:14155551212).
1.1 Create the app and layout
Create a project using the Empty Activity template and call it PhoneCallDial.
Add an icon for the call button by following these steps:
Select the drawable/ folder in the Project: Android view and choose File > New > Vector Asset.
Click the Android icon next to "Icon:" to choose an icon. To find a handset icon, choose Communication in the left column.
Select the icon, click OK, click Next, and then click Finish.
Open the activity_main.xml layout file.
- Change the root view to RelativeLayout.
- In the "Hello World" TextView element, remove the
layout_constraintattributes, if they are present. - Change the TextView to show a dummy contact name, as if the app had retrieved the name from a contacts database and assigned it to a TextView:
<TextView
android:id="@+id/contact_name"
android:layout_width="wrap_content"
android:layout_height="wrap_content"
android:layout_margin="@dimen/activity_horizontal_margin"
android:textSize="24sp"
android:text="Jane Doe" />
Extract the strings and dimensions into resources:
24sp:contact_text_sizefor the text size.Jane Doe:contact_namefor the text.
Add another TextView for the phone number:
<TextView
    android:id="@+id/number_to_call"
    android:layout_width="wrap_content"
    android:layout_height="wrap_content"
    android:layout_margin="@dimen/activity_horizontal_margin"
    android:layout_below="@id/contact_name"
    android:text="14155551212" />
You will use the
android:idnumber_to_callto retrieve the phone number.After adding a hard-coded phone number string, extract it into the resource
phone_number.Add an ImageButton for initiating the call:
<ImageButton
    android:id="@+id/phone_icon"
    android:contentDescription="Make a call"
    android:layout_width="wrap_content"
    android:layout_height="wrap_content"
    android:layout_below="@id/contact"
    android:layout_toRightOf="@id/number_to_call"
    android:layout_toEndOf="@id/number_to_call"
    android:src="@drawable/ic_call_black_24dp"
    android:onClick="dialNumber"/>
Use the vector asset you added previously (for example
ic_call_black_24dpfor a phone handset icon) for theandroid:srcattribute. You will use theandroid:id@phone_iconto refer to the button for dialing the phone.The
dialNumbermethod referred to in theandroid:onClickattribute remains highlighted until you create this method in the MainActivity, which you do in the next step.After adding a hard-coded content description, extract it into the string resource
make_a_call.Click
dialNumberin theandroid:onClickattribute, click the red light bulb that appears, and then select Create dialNumber(View) in 'MainActivity'. Android Studio automatically creates thedialNumber()method in MainActivity aspublic, returningvoid, with aViewparameter. This method is called when the user taps the ImageButton.public void dialNumber(View view) { }
The layout should look something like the figure below.

The following is the complete code for the XML layout in activity_main.xml, including comments:
<RelativeLayout …
    <!-- TextView for a dummy contact name from a contacts database -->
    <TextView
        android:id="@+id/contact_name"
        android:layout_width="wrap_content"
        android:layout_height="wrap_content"
        android:layout_margin="@dimen/activity_horizontal_margin"
        android:textSize="@dimen/contact_text_size"
        android:text="@string/contact" />

    <!-- TextView for a hard-coded phone number  -->
    <TextView
        android:id="@+id/number_to_call"
        android:layout_width="wrap_content"
        android:layout_height="wrap_content"
        android:layout_margin="@dimen/activity_horizontal_margin"
        android:layout_below="@id/contact_name"
        android:text="@string/phone_number" />

    <!-- The dialNumber() method will be called by this button.  -->
    <ImageButton
        android:id="@+id/phone_icon"
        android:contentDescription="@string/make_a_call"
        android:layout_width="wrap_content"
        android:layout_height="wrap_content"
        android:layout_below="@id/contact_name"
        android:layout_toRightOf="@id/number_to_call"
        android:layout_toEndOf="@id/number_to_call"
        android:src="@drawable/ic_call_black_24dp"
        android:onClick="dialNumber"/>
</RelativeLayout>
1.2 Edit the onClick method in MainActivity
- In MainActivity, define a constant for the log tag.
public static final String TAG = MainActivity.class.getSimpleName(); - Inside the
dialNumber()method created in the previous section, create a reference to thenumber_to_callTextView:public void dialNumber(View view) { TextView textView = (TextView) findViewById(R.id.number_to_call); ... - To create the phone number URI string
phoneNumber, get the phone number fromtextViewand use it withString.formatto include thetel:prefix:... // Use format with "tel:" and phone number to create mPhoneNum. String phoneNumber = String.format("tel: %s", textView.getText().toString()); ... - Define an implicit intent (
dialIntent) with the intent actionACTION_DIAL, and set thephoneNumberas data for the intent:... // Create the intent. Intent dialIntent = new Intent(Intent.ACTION_DIAL); // Set the data for the intent as the phone number. dialIntent.setData(Uri.parse(phoneNumber)); ... - To verify that an app exists to receive the intent, call resolveActivity() on your Intent object with getPackageManager() to get a PackageManager instance for finding package information. The
resolveActivity()method determines the best action to perform for a given intent. If the result is non-null, there is at least one app that can handle the intent and it's safe to callstartActivity().... // If package resolves to an app, send intent. if (dialIntent.resolveActivity(getPackageManager()) != null) { startActivity(dialIntent); } else { Log.e(TAG, "Can't resolve app for ACTION_DIAL Intent."); } ...
The full method should now look like the following:
public void dialNumber() {
    TextView textView = (TextView) findViewById(R.id.number_to_call);
    // Use format with "tel:" and phone number to create phoneNumber.
    String phoneNumber = String.format("tel: %s",
                                       textView.getText().toString());
    // Create the intent.
    Intent dialIntent = new Intent(Intent.ACTION_DIAL);
    // Set the data for the intent as the phone number.
    dialIntent.setData(Uri.parse(phoneNumber));
    // If package resolves to an app, send intent.
    if (dialIntent.resolveActivity(getPackageManager()) != null) {
        startActivity(dialIntent);
    } else {
        Log.e(TAG, "Can't resolve app for ACTION_DIAL Intent.");
    }
}
1.3 Run the app
You can run the app on either an emulator or a device:
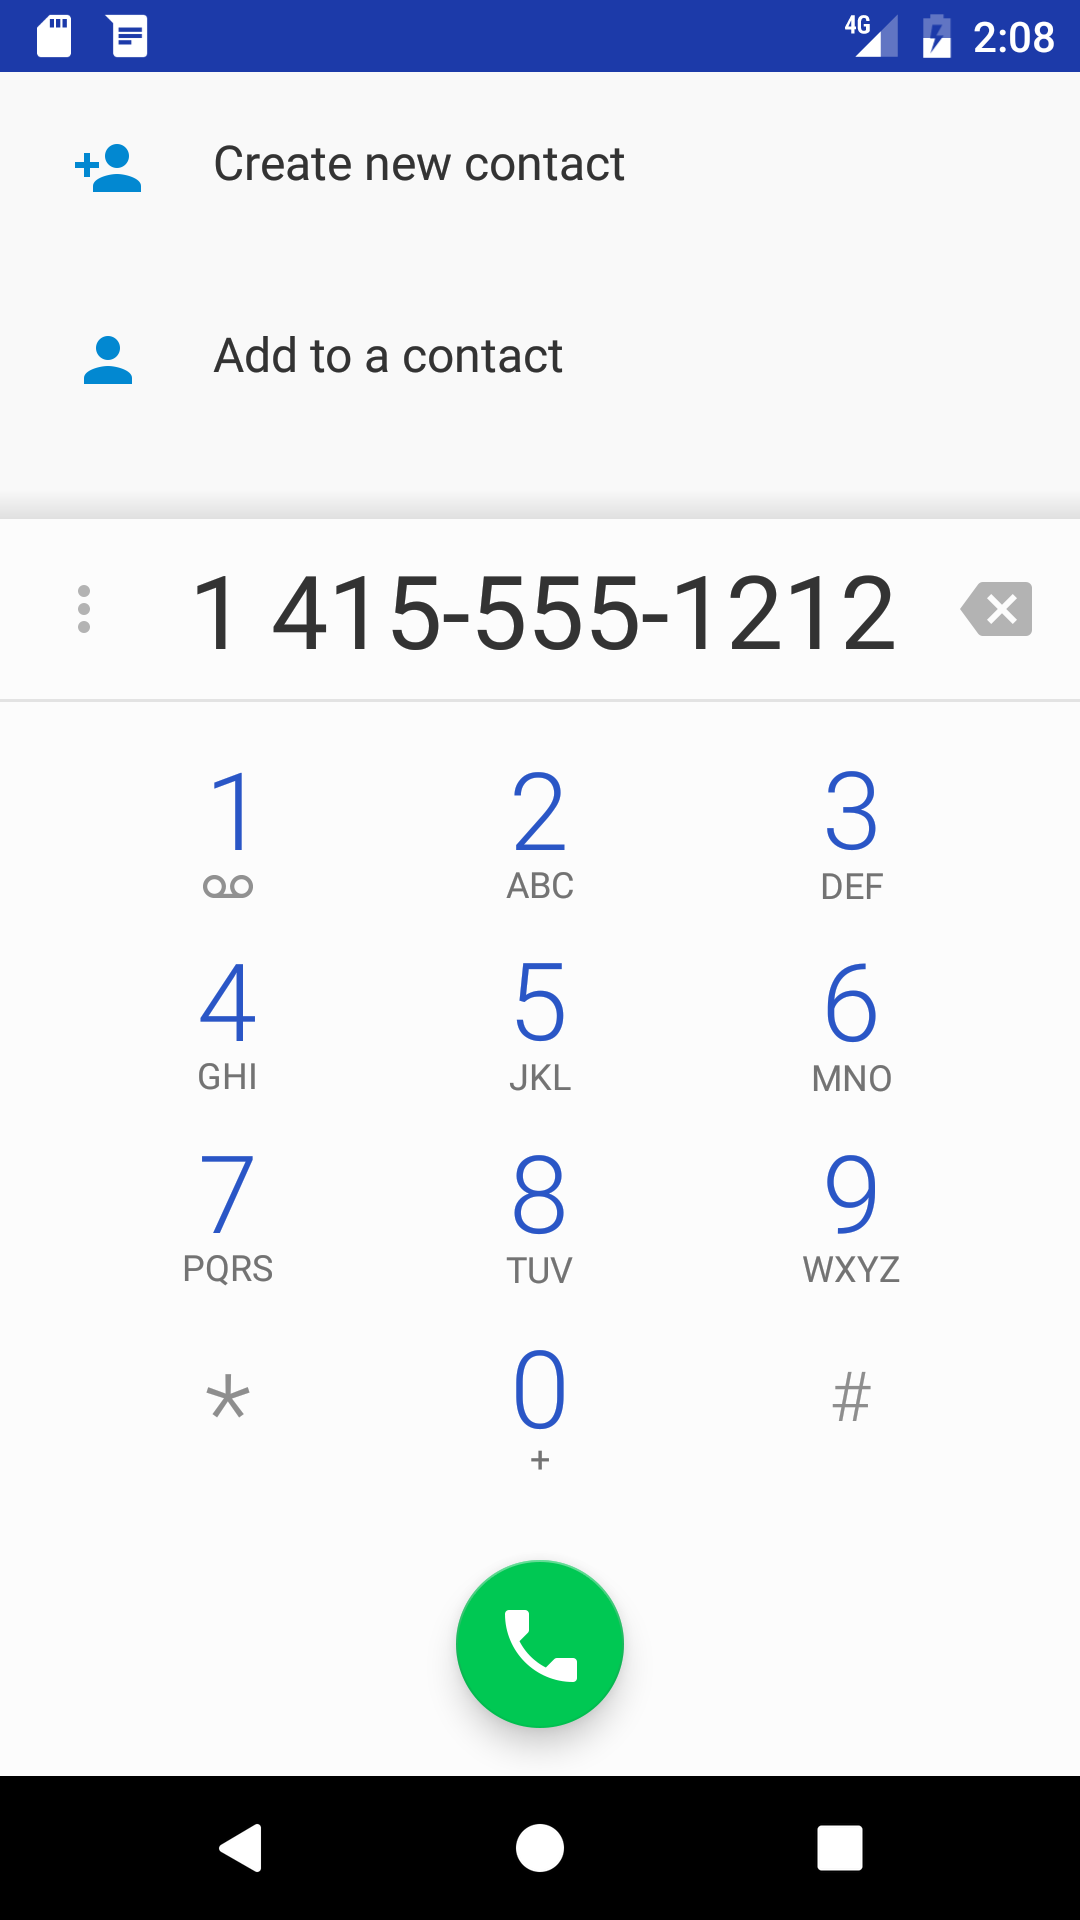
Click or tap the phone icon. The dialer should appear with the phone number ready to use, as shown in the figure below:
The
phone_numberstring holds a fixed number (1-415-555-1212). You can change the number in the Phone app's dialer before calling.Use the Back button to return to the app. You may need to tap or click it two or three times to navigate backwards from the Phone app's dialer and Favorites list.
Solution code
Android Studio project: PhoneCallDial
Task 2. Make a phone call from within an app
In this task you will copy the PhoneCallDial app from the previous task, refactor and rename it to PhoneCallingSample, and modify its layout and code to create an app that enables a user to enter a phone number and perform the phone call from within your app.
In the first step you will add the code to make the call, but the app will work only if telephony is enabled, and if the app's permission for Phone is set manually in Settings on the device or emulator.
In subsequent steps you will do away with setting this permission manually by requesting phone permission from the user if it is not already granted. You will also add a telephony check to display a message if telephony is not enabled and code to monitor the phone state.
2.1 Create the app and add permission
- Copy the PhoneCallDial project folder, rename the folder to PhoneCallingSample, and refactor the app to populate the new name throughout the app project. (See the Appendix for instructions on copying a project.)
Add the following permission to the AndroidManifest.xml file after the first line (with the
packagedefinition) and before the<application>section:<uses-permission android:name="android.permission.CALL_PHONE" />Your app can't make a phone call without the
CALL_PHONEpermission line in AndroidManifest.xml. This permission line enables a setting for the app in the Settings app that gives the user the choice of allowing or disallowing use of the phone. (In the next task you will add a way for the user to grant that permission from within the app.)
2.2 Create the app layout
- Open activity_main.xml to edit the layout.
- Remove the
contact_nameTextView, and replace thenumber_to_callTextView with the following EditText view:<EditText android:id="@+id/editText_main" android:layout_width="wrap_content" android:layout_height="wrap_content" android:layout_margin="@dimen/activity_horizontal_margin" android:inputType="phone" android:hint="Enter a phone number" /> After adding a hard-coded string for the
android:hintattribute, extract it into the string resourceenter_phone, and note the following:- You will use the
android:idfor the EditText view in your code to retrieve the phone number. - The EditText view uses the
android:inputTypeattribute set to"phone"for a phone-style numeric keypad.
- You will use the
Change the ImageButton as follows:
Change the
android:layout_below,android:layout_toRightOf, andandroid:layout_toEndOfattributes to refer toeditText_main.Add the
android:visibilityattribute set tovisible. You will control the visibility of this ImageButton from your code.Change the android:onClick method to
callNumber. This will remain highlighted until you add that method to MainActivity.<ImageButton android:id="@+id/phone_icon" android:contentDescription="@string/make_a_call" android:layout_width="wrap_content" android:layout_height="wrap_content" android:layout_margin="@dimen/activity_horizontal_margin" android:layout_toRightOf="@id/editText_main" android:layout_toEndOf="@id/editText_main" android:src="@drawable/ic_call_black_24dp" android:visibility="visible" android:onClick="callNumber"/>
- Add the following Button at the end of the layout, before the ending
</RelativeLayout>tag:<Button android:id="@+id/button_retry" android:layout_width="wrap_content" android:layout_height="wrap_content" android:contentDescription="Retry" android:layout_below="@id/editText_main" android:text="Retry" android:visibility="invisible"/> </RelativeLayout> - After adding a hard-coded string "Retry" for the
android:contentDescriptionattribute, extract it into the string resourceretry, and then replace the hard-coded string in theandroid:textattribute to"@string/retry". - Note the following:
- You will refer to the the
android:idbutton_retryin your code. - Make sure you include the
android:visibilityattribute set to"invisible". It should appear only if the app detects that telephony is not enabled, or if the user previously denied phone permission when the app requested it.
- You will refer to the the
Your app's layout should look like the following figure (the button_retry Button is invisible):

2.3 Change the onClick method in MainActivity
- In MainActivity, refactor and rename the
dialNumber()method to call itcallNumber(). - Change the first statement, which referred to a TextView, to use an EditText view:
public void callNumber(View view) { EditText editText = (EditText) findViewById(R.id.editText_main); ... } - Change the next statement to get the phone number from the EditText view (
editText) to create the phone number URI stringphoneNumber:// Use format with "tel:" and phone number to create phoneNumber. String phoneNumber = String.format("tel: %s", editText.getText().toString()); - Before the intent, add code to show a log message and a toast message with the phone number:
// Log the concatenated phone number for dialing. Log.d(TAG, "Phone Status: DIALING: " + phoneNumber); Toast.makeText(this, "Phone Status: DIALING: " + phoneNumber, Toast.LENGTH_LONG).show(); - Extract
"Phone Status: DIALING: "to a string resource (dial_number). Replace the second use of the string in theToast.makeText()statement togetString(R.string.dial_number). - Refactor and rename the
dialIntentimplicit intent tocallIntent, and replaceACTION_DIALwithACTION_CALL. As a result, the statements should now look like this:... // Create the intent. Intent callIntent = new Intent(Intent.ACTION_CALL); // Set the data for the intent as the phone number. callIntent.setData(Uri.parse(phoneNumber)); // If package resolves to an app, send intent. if (callIntent.resolveActivity(getPackageManager()) != null) { startActivity(callIntent); } else { Log.e(TAG, "Can't resolve app for ACTION_CALL Intent."); } ...
The full method should now look like the following:
public void callNumber() {
EditText editText = (EditText) findViewById(R.id.editText_main);
// Use format with "tel:" and phone number to create phoneNumber.
String phoneNumber = String.format("tel: %s",
                                     editText.getText().toString());
// Log the concatenated phone number for dialing.
Log.d(TAG, getString(R.string.dial_number) + phoneNumber);
Toast.makeText(this,
getString(R.string.dial_number) + phoneNumber,
Toast.LENGTH_LONG).show();
// Create the intent.
Intent callIntent = new Intent(Intent.ACTION_CALL);
// Set the data for the intent as the phone number.
callIntent.setData(Uri.parse(phoneNumber));
// If package resolves to an app, send intent.
if (callIntent.resolveActivity(getPackageManager()) != null) {
startActivity(callIntent);
} else {
Log.e(TAG, "Can't resolve app for ACTION_CALL Intent.");
}
}
2.4 Run the app
When you run the app, the app may crash with the following screen depending on whether the device or emulator has been previously set to allow the app to make phone calls:
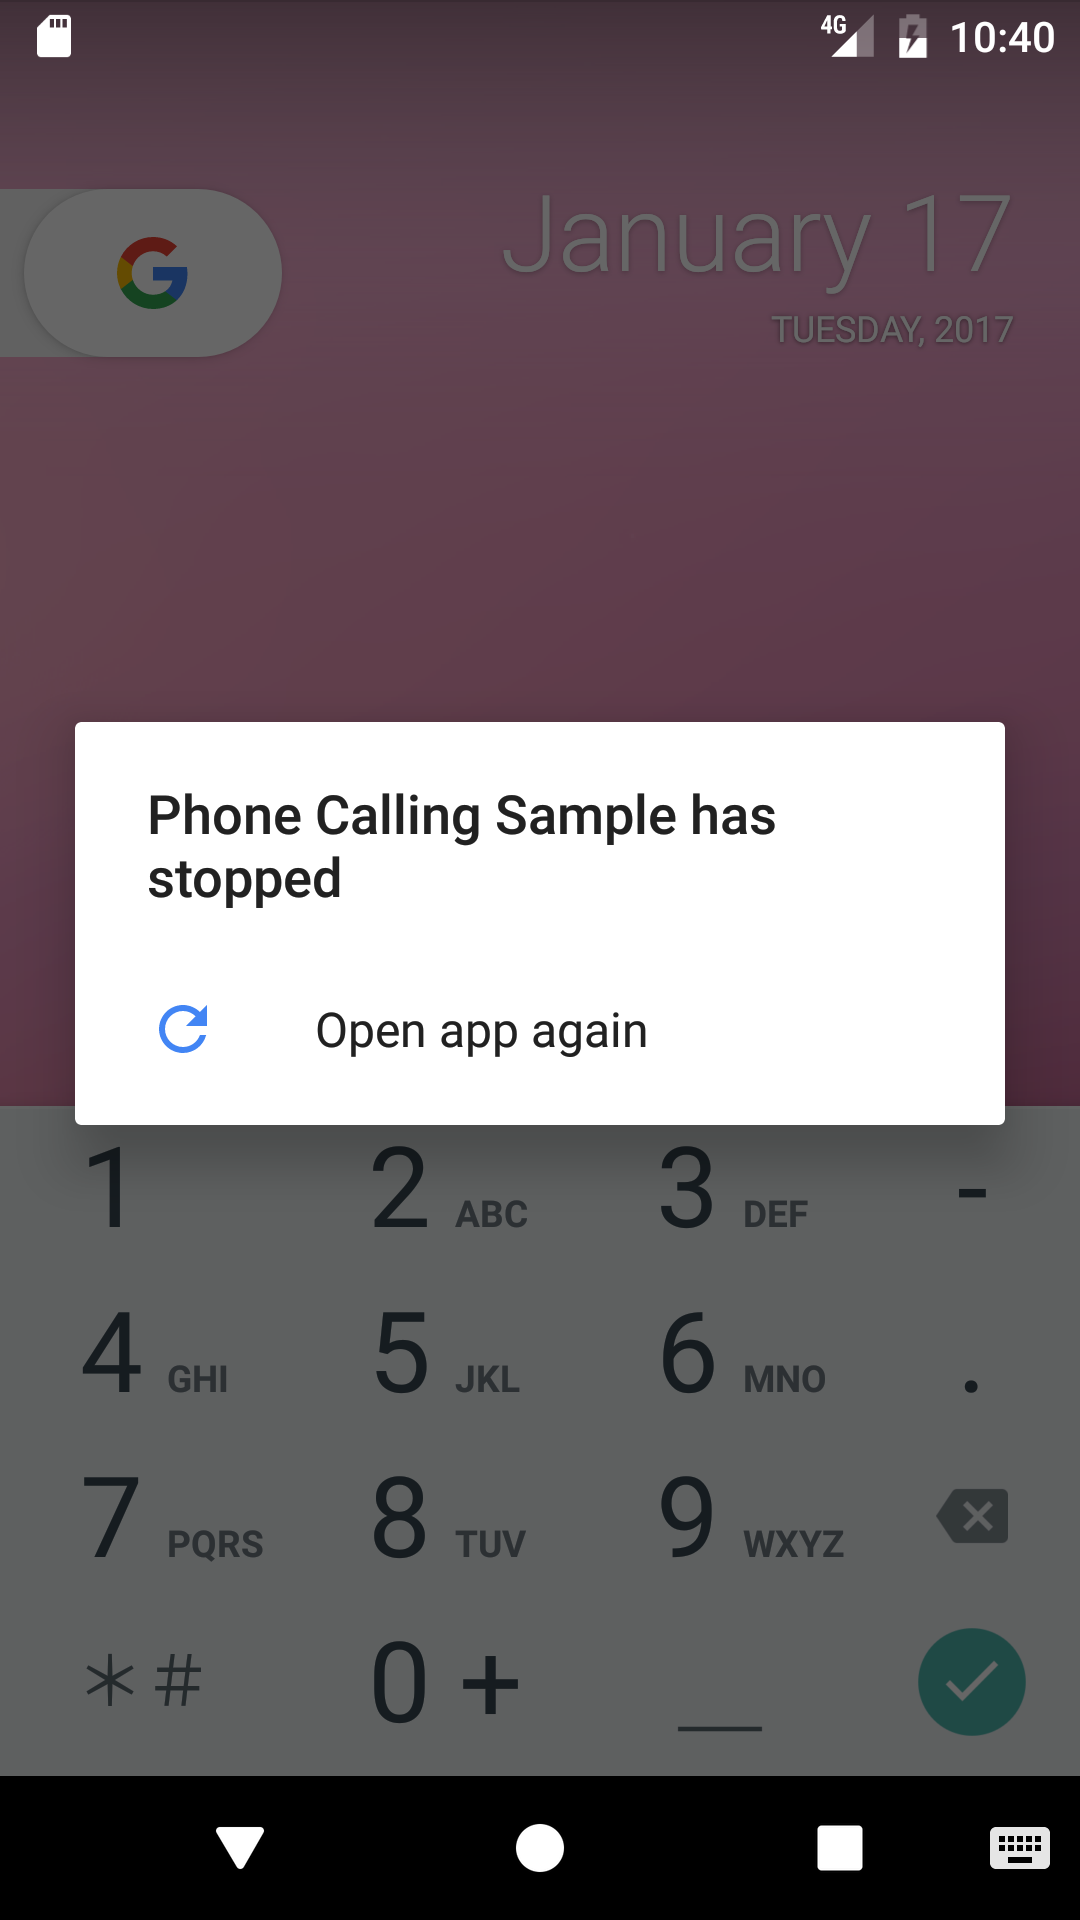
In some versions of Android, this permission is turned on by default. In others, this permission is turned off by default.
To set the app's permission on a device or emulator instance, perform the function that a user would perform: choose Settings > Apps > Phone Calling Sample > Permissions on the device or emulator, and turn on the Phone permission for the app. Since the user can turn on or off Phone permission at any time, you have to add a check in your app for this permission, and request it from the user if required. You will do this in the next task.
If you don't have cellular service on your device, or if telephony is not enabled, you can test the app using two emulator instances—one emulator instance calls the other one. Follow these steps:
- To launch an emulator directly from the AVD Manager, choose Tools > Android > AVD Manager.
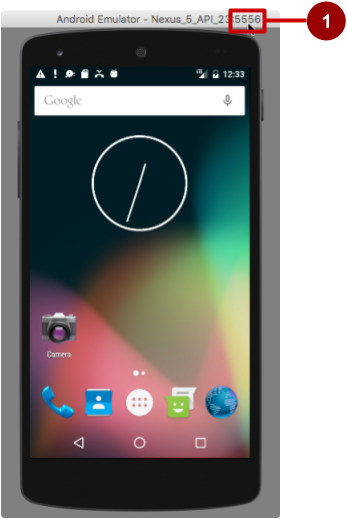
Double-click a predefined device. Note the number that appears in the emulator's window title on the far right, as shown in the figure below as #1 (5556). This is the port number of the emulator instance.
Open the Android Studio project for the app, if it isn't already open.
Run the app, but choose another emulator—not the one that is already running. Android Studio launches the other emulator.
In the app, enter the port number of the other emulator rather than a real phone number.
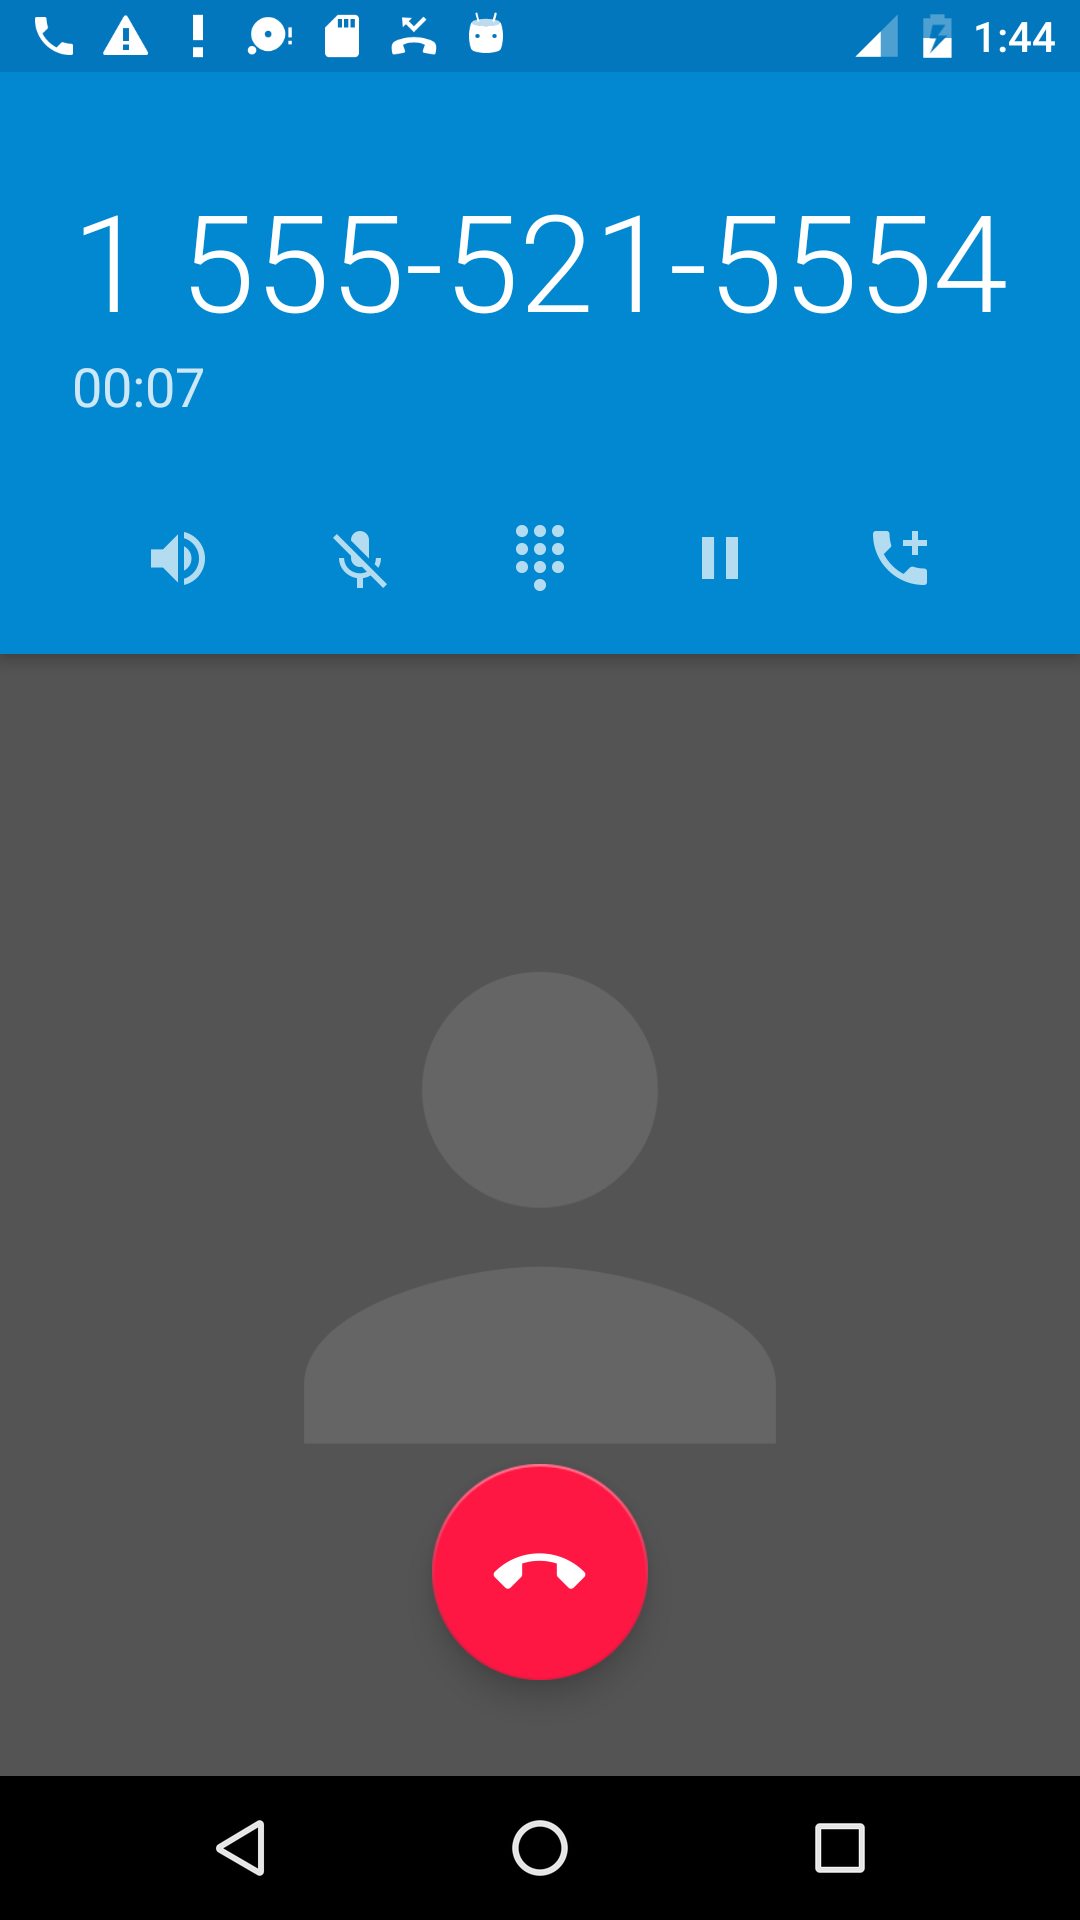
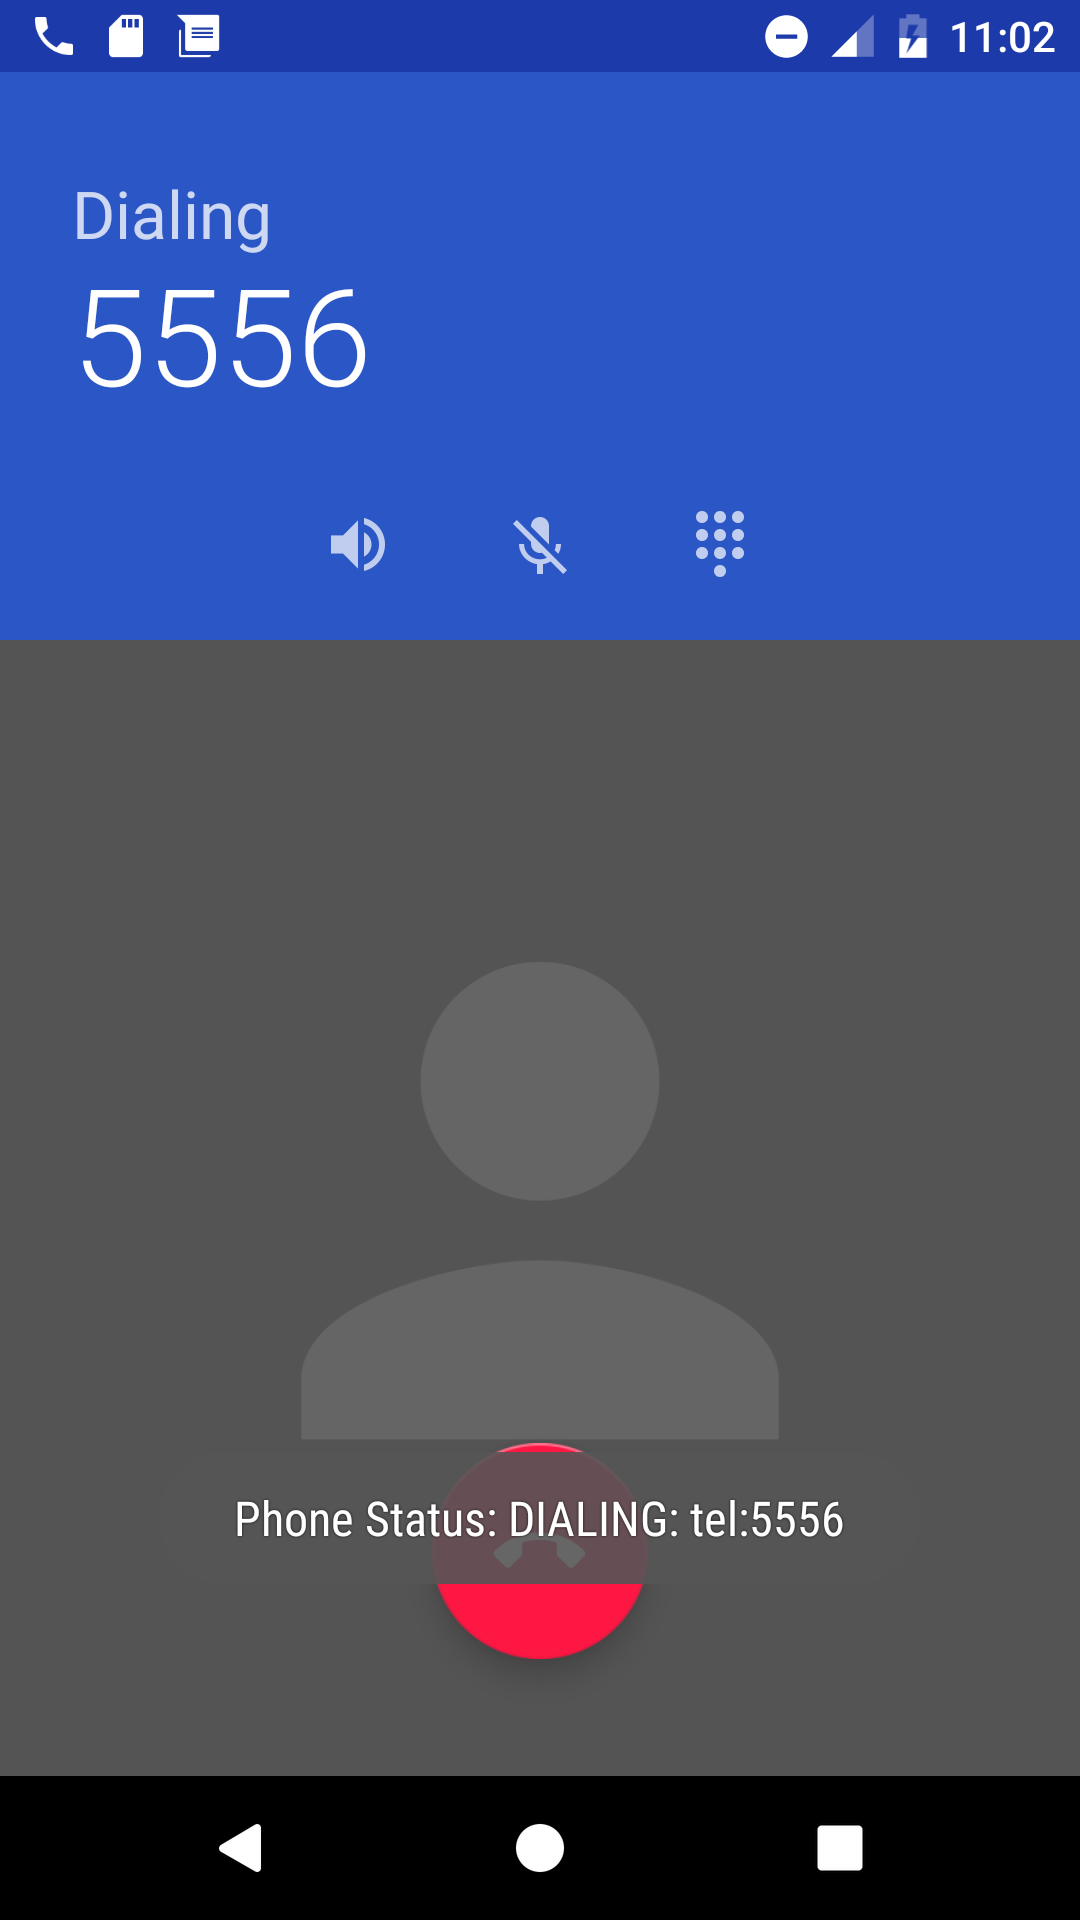
Click the call button in the app. The emulator shows the phone call starting up, as shown in the figure below.
 The other emulator instance should now be receiving the call, as shown in the figure below:
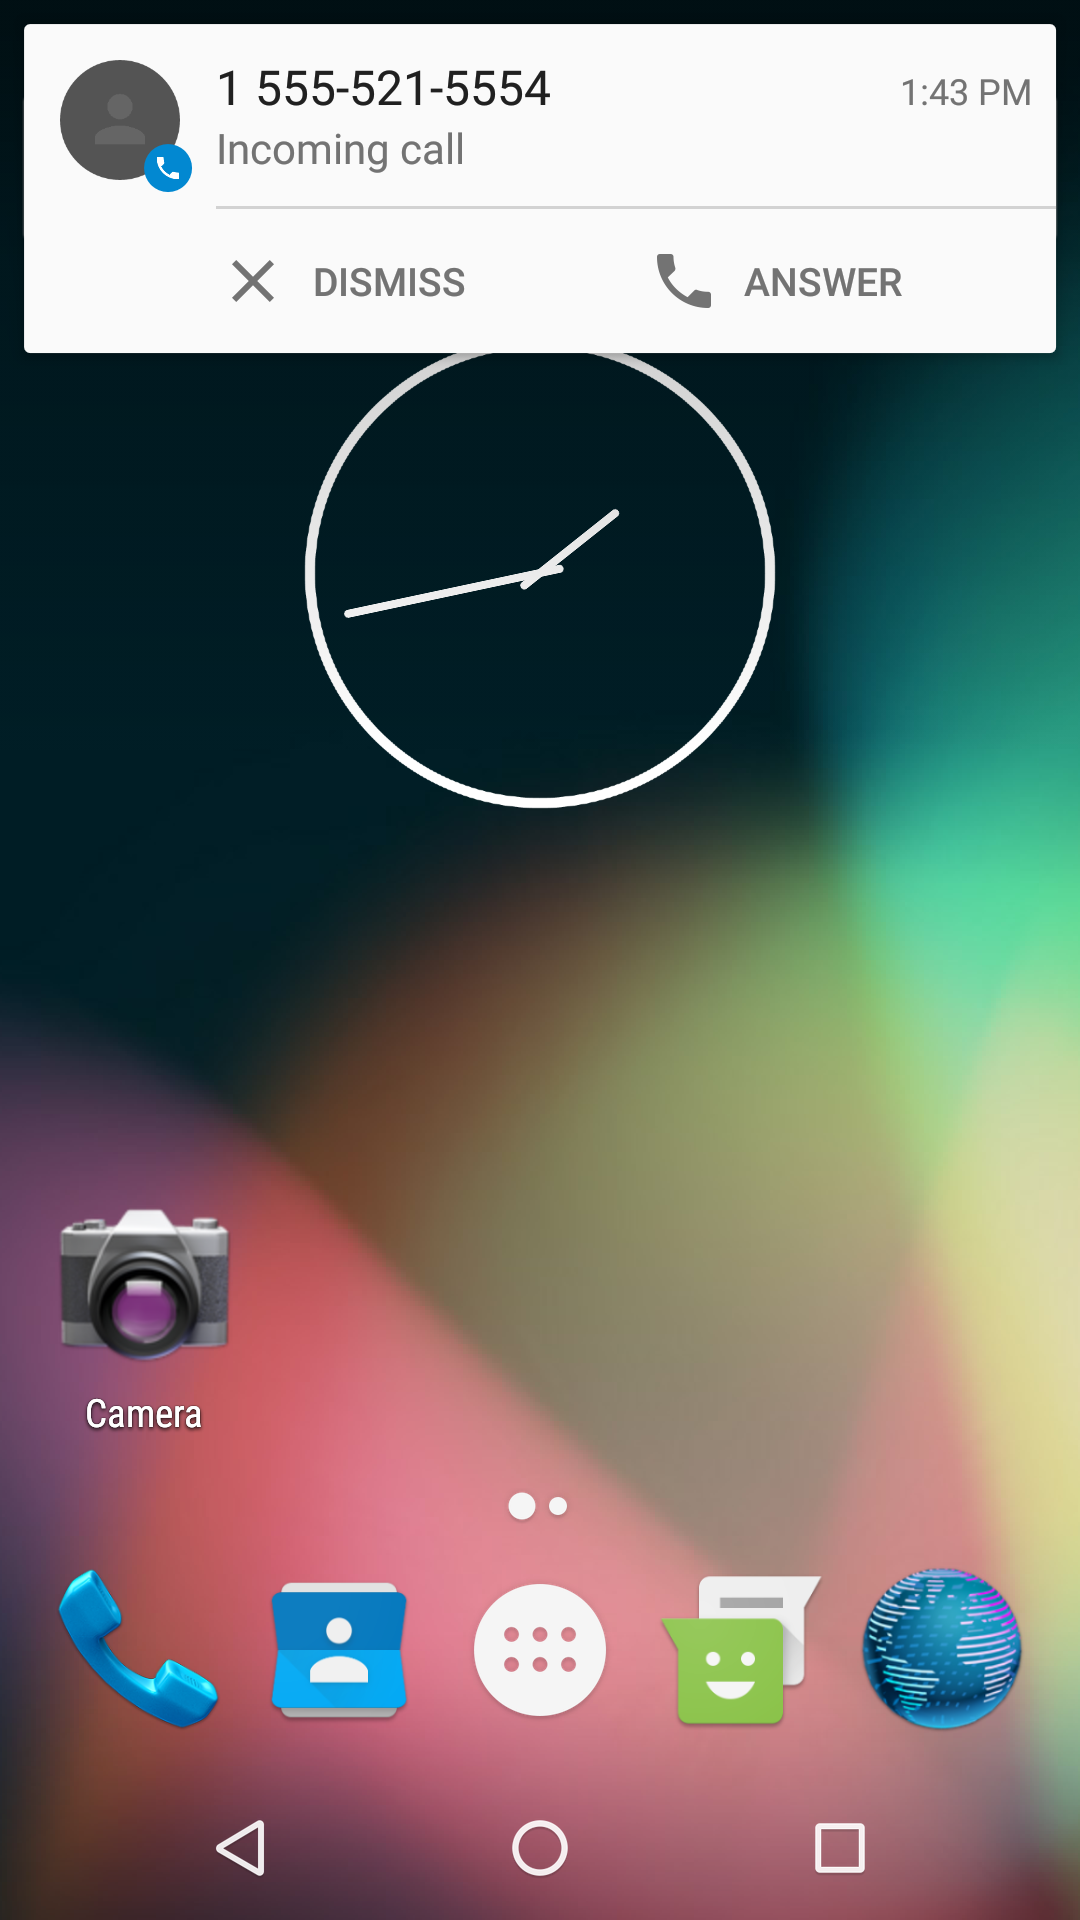
Click Answer or Dismiss on the emulator receiving the call. If you click Answer, also click the red Hang-up button to end the call.
